In this episode we will be leaving the History of Metro (which I covered in part1, part2 and part3). Let’s look at TODAY 😎
I have a lab setup ready to go and break stuff!! But first, I will walk through the lab overview (what is what) and the lab walkthrough (how is it configured). Without further ado, let’s dive in the overview!Oh and if you’re not into reading, you can optionally watch the SETUP VIDEO and the WALKTHROUGH VIDEO below 🙂
Lab Overview
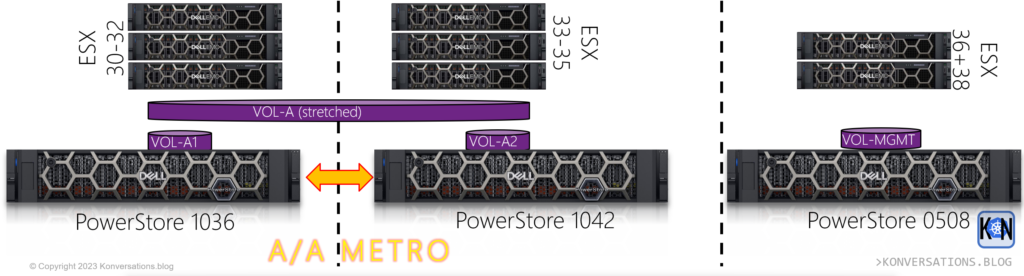
In the lab, I have the luxury of three Datacenters (DCs): Twin DCA-DCB, and remote DCC. Each DC has its own PowerStore and several VMware ESX hosts.
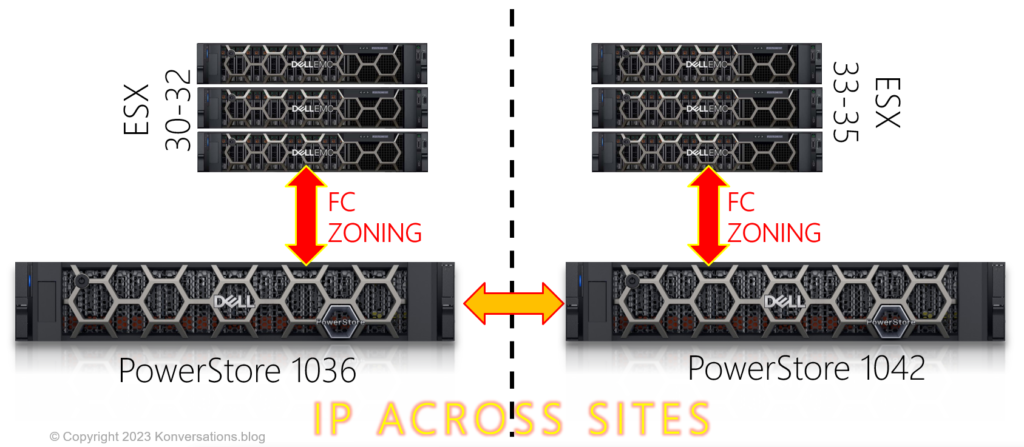
As you can see, FC zoning is local only; there is no FC leaving the datacenter. The only storage-related connectivity is the IP connectivity between the PowerStores. This connection builds and maintains the Active/Active metro mirroring.
Site DCC (the third site) contains all the management stuff. It has its own PowerStore, and two ESX nodes. It runs things like the vCenter (no not cloud what happens if we kill resources on DCA or DCB) and it can also hold the witness VM:
All that we need to add now, is the vSphere configuration that we run on top of the ESX hosts:
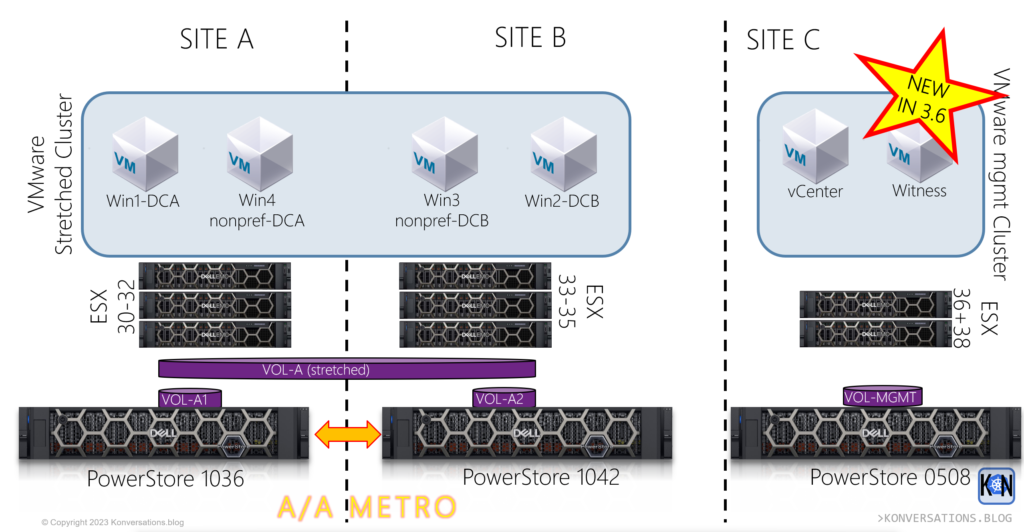
Spanning across DCA and DCB I configured a stretched cluster. This cluster has a full metro configuration. DCC just delivers the supporting VMs such as vCenter and the optional Witness VM.
Workloads running are four Windows VMs; Win1 and Win2 are running in DCA and DCB respectively, and they are running on a preferred volume. Win3 and Win4 are the other way round; they run on non-preferred volumes. As we break stuff we should be able to observe a difference!
As with the entire series, you can optionally watch this story as a video as well 🙂
Watch the SETUP VIDEO
Lab WALKTHROUGH VIDEO
If you want to see how this architecture was actually implemented in the lab take a look at the second video:
2 thoughts on “Blog Series: Metro – Lab Setup overview and walkthrough”